Saturday, May 28, 2011
BLOWN OUT
Sunday, May 22, 2011
2011-05-22 Spring Creek

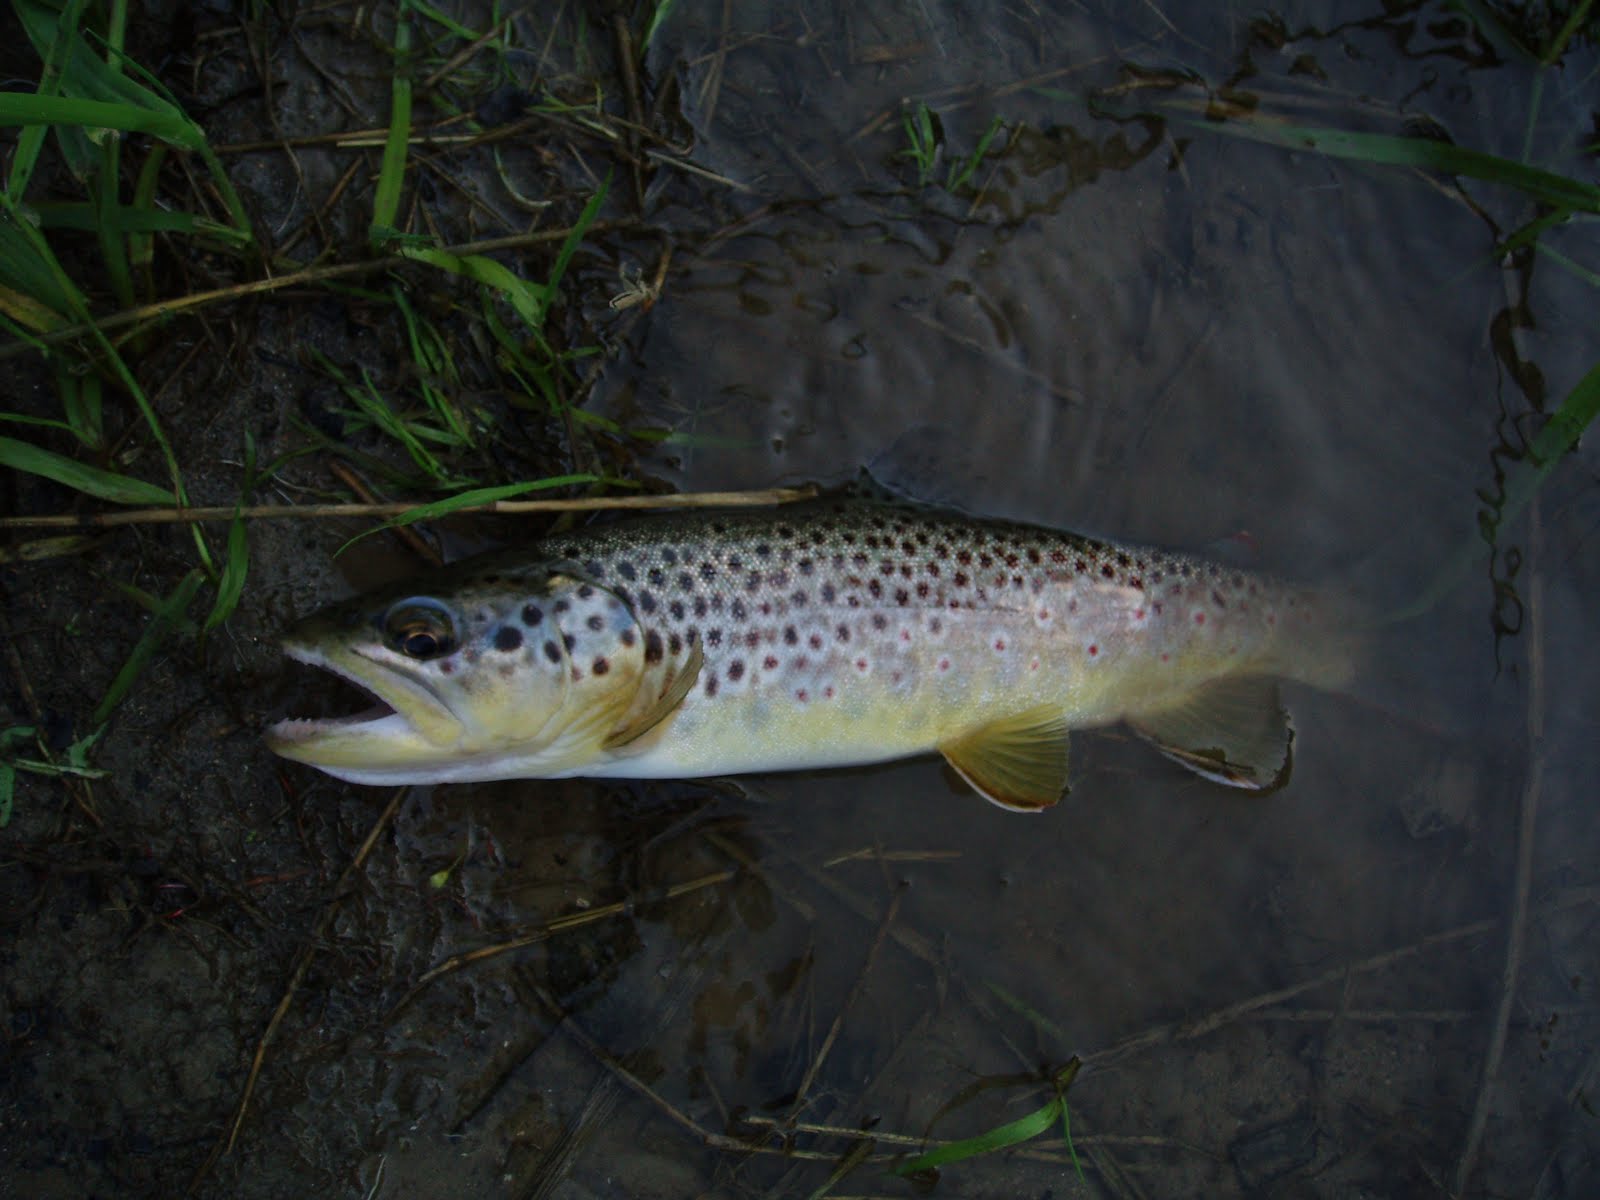
 To start out, I tied on a size 14 green wolf and a size 16 scud as a dropper. For the first hour I had only seen a few fish stalking close to shore, although I did get one to come up and look at the dry midstream. So I decided to go to a black woolly bugger which I do not typically fish, but this was the best time to throw them out and see how to use them. There were a few follows, but no solid chasers. One guy I talked to said he had 12 takes on a black streamer and rolled about 5 other fish. After about an hour of throwing a streamer I changed to a size 14 caddis and a tungsten bead head size 16 hare's ear on about 1.5 ft of x6 tippet. Also there was more sun out and the air temperature was warming up. With this combo I pulled in four browns and a nice rainbow (really bad photo of the rainbow).


With the sun and an increase in the air temperature there were a few mayflys out, but not enough to start the trout rising.


I did see my first snake of the summer and it had to be right next to were I had snagged my line.

Still a very good day on spring creek even though it was high and brown.
Saturday, May 21, 2011
Scud Step-by-Step
Step 1 - Lay down a layer of sticky back lead, multiple applications can be used to get the right weight.

Step 2 - Tie on the tying thread (Rusty Dun was used here), leave about 3-4 inches of waste to use as the ribbing. Lay down enough thread to make a smooth body.

Step 3 - Tie in a strip of clear coloured surgical glove - 2 mm wide and longer enough to cover the length of the hook.

Step 4 - Loosely dub the thread with hares ear dubbing, or similar dubbing, and cover the entire hook to build the scud body.

Step 5 - Pull over the glove and tie down.

Step 6 - Rib the body with the waste tying thread and whip finish the tail. If you want, some wood duck or partridge fibers can be tied in over the hook eye to represent tails.

Step 7 - The final step is to pull out some of the dubbing to make it more leggy.
Monday, May 16, 2011
Flies for fun


Sunday, May 15, 2011
2011-05-14 Spring Creek and Little Juniata
Spring creek was pretty void of anglers and trout when we were there, but I was able to get a few (3 to be exact) on a size 16 scud. The top water bug life was not great and we were only in the paradise section.
I have never been to the LJ, but from the forums I was hearing that we should get into some sulphurs. Not totally sure where we were, as I was getting told the directions as I was driving, but I know it was in the Rothrock State Forest, near Barree, at the end of road with a car park full of people. About 4-5 left hand turns after the low one way bridge.
After a short walk in we were on the river, which was 53F (water temp) when we got there and looked ok for wet wading. We were told on the hike in that fish were being taken on caddis nymphs, but no really hatch was happening. However, that was to change pretty quickly. With in an hour, so around 5pm, sulphurs were coming off and the section that we were in started to see a steady rise of trout. They were big splashy rises so on with the size 16 sulphur emerger. Over a period of 2 hours I was able to get 5 brownies all on the surface. I fouled hooked one and it would not stop fighting, but was a really decent size and dwarfed the other fish I landed. I also took one dunk in the water from the slippery rocks and it did make the drive home uncomfortable. My friend got a couple to the net, which was a pleasure to see as he was yet to catch a trout in PA.
All in all it was a good day out and I have the bruised knees to show for it.


Sunday, May 8, 2011
Sulphur Nymph
Materials list:
Weight - Stick back lead
Hook – size 16 nymph hook
Tail – pheasant tail
Nymph Body – Embroidery thread – yellow and brown or two shades of yellow
Under Body – Hare Ear dubbingWings Casing – pheasant tail
Legs - Feather from a Mallard
 Step 1 - Place the hook in the vice and apply a layer of stick back lead with a double wrap near the head of the fly.
 Step 2 - Tie in ~3-4 pheasant tail fibers.
 Step 3 - Tie in the weaving thread on the sides of the fly and tie off the tying thread.
 Step 4 - Weave the body about half the length of the fly using the knot weave, here I was alternating the colour that went in front of the other to get a stripped look.
 Step 5 - Retie on the tying thread and tie down the weaving threads and remove the waste. Tie in ~6 pheasant tail fibers.
 Step 6 - Dub the body of the fly, I did not go back far enough so there looks to be a disjoint in the fly which should not be there.
 Step 7 - Take the mallard feather and cut a notch to form legs on either side of the fly, tie on the legs and remove the waste.
 Step 8 - pull the wing casing forward and tie down. You can either remove the waste else I have split the waste and done a figure 8 around them to make eyes for the nymph.
 Step 9 - Whip finish the tying thread behind the eyes and cut off the waste and shorten the pheasant tail to make the eyes. Apply head cement to finish the fly
Morel Season


Saturday, May 7, 2011
2011-05-06 Spring Creek
After that the fishing got alot tougher, but we did get a few more from the creek before heading home at 11:30 am. Additionally, Spring Creek was filling up with people, not only to fish, but to watch the bald eagle. My camera is just an old point and click digital camera, but in the photo below I have circled the eagle (black circle) and it's nest (red circle).

The whole time we were at Spring Creek we did not observe a hatch, and the only flying insects were midges.
Thursday, May 5, 2011
Flies of 2011
 Sulphur nymph with a weaved body (size 18 - 16) - Will put a step-by-step tying guide up for this fly.
 Deer hair caddis (size 16-14), this has been the top dry fly for me. Good for dropping a nymph off, but still bring them to the surface.
 CDC Caddis (size 14) - An unsinkable fly and has the perfect profile from the side and from below. This is a copy of the one tied by Oliver Edwards, but with a turkey feather wing instead of the sticky tape that Oliver used.
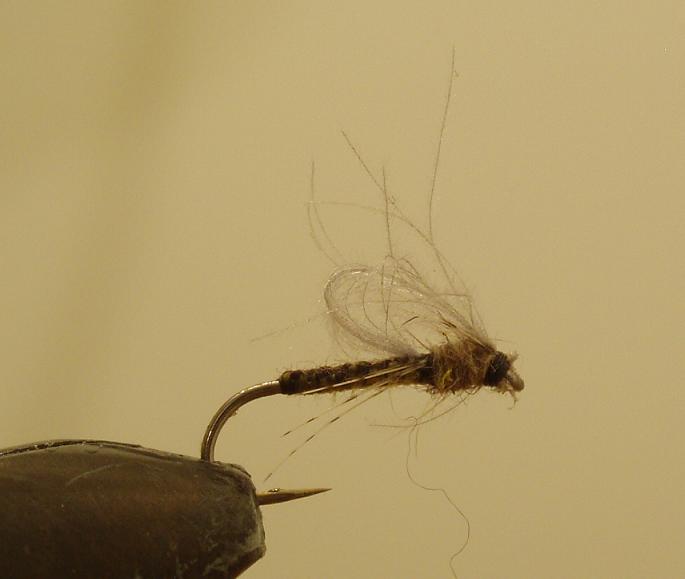 BWO emerger with a weaved body (size 16 -20) - CDC will hold anything up and the weaving produces that two tone body that nymphs have.
DVD - Reviews part 2
Another one of those DVDs that shows off the best of New Zealand. This DVD covers the North and South Island, additionally it is not just rivers but some of the best lakes in New Zealand. A very good DVD if you are planning on heading to New Zealand. 4/5
Advanced Fly Casting - Classic Series - Scientific Anglers
This DVD covers all the casts that you need to know, and even goes over what was in the prior DVD. However, the guy in the DVD reminds me of Elmer Fudd. It is a good watch if all you know how to do is the over head and side casts. So you will be reach casting, slack line casting and mending like a pro. 4/5
Anatomy of a Trout Stream - Classic Series - Scientific Anglers
If you are not sure where to look, or just want to know this is a good DVD to start with. Watch out for the giant orange painted concrete trout the next time you are out on the stream. Got to love these old school VHS to DVD videos, but well worth the watch. 4/5
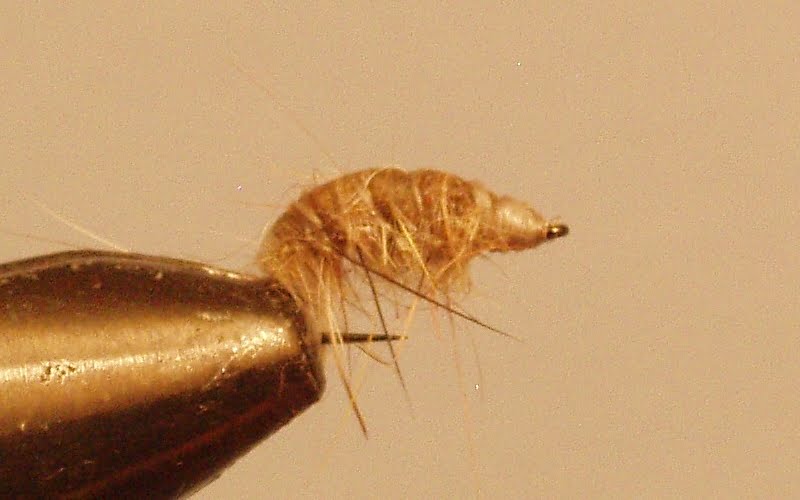
Sulphur Emerger
It is almost time for the sulphurs (ephemerella dorothea) to start appearing on Spring Creek, my local PA trout stream. The hatch starts around the beginning of May and you can expect to see them up until the end of June, however with this years weather it could be all over the place. While the weather is bad and the rivers blown out it is time to experiment with tying for this hatch.
For the sulphur tying swap I decided to put together this little number that also incorporates a number of skills I picked up from Oliver Edwards. This is not completely my own creation but my inclusion of a weaved body makes the fly that little bit more interesting. By using a weave it is possible to achieve a two tone body section which can not be easily achieve with straight tying techniques, unless you little marker pens.
This fly sits low in the film surface and the tail section should sit below the film giving the trout that perfect silhouette. Even before the sulphur hatch has begun I have seen some very nice trout being fooled into taking this fly.
I hope that you enjoy this step-by-step guide to my weaved body sulphur emerger and it brings you much enjoy on the river as it has for me.
Tight Lines
Materials list:
Hook – TMC 206BL size 16 (I have done up to 18)
Tail – pheasant tail
Nymph Body – Embroidery thread – yellow and brown or two shades of yellow
Sulphur Body – 2 mm of close patch foam in yellow (not pictured)
Under Body – Dry fly dubbing – sulphur yellow (or CDC dubbing for extra floating strength)
Wings – Hackle in Grey
Tools – as pictured
Tying Guide
Step 1 - Place the hook in the vise so that the bend is exposed and Tie in 3 (or more) pheasant tail fibers

Step 2 - The embroidery threads have 6 strands, pull out two from each colour and tie them in down the bend of the hook on each side. Whip finish the tying tread and cut off, else it will get in the way while weaving

Step 3a - The Knot Weave – out of all the weaves I know this is the easiest, because it is not really weaving and you do not have to keep tension during the weave so you can drink your beer while you do it. First thing is to decide what colour you want on top; here I am wanting brown on top. So all you do is thumb knot with the colour you want on top going in front of the colour on the bottom. This weave is from Essential Skills w/ Oliver Edwards, part 3.

Step 3b - Next thing is to split the knot and slide it on the hook, here the hook eye is between the brown and yellow thread. Slide the knot to the back of the hook where the tails were tied in and tighten.

Step 3c - For the size 16 I do about 5 knots on each side, which you can count when you look at the side of the fly

Step 3d - Retie on the tying tread and tie down the weaving threads and clip off the waste

Step 4 - Tie in a strip of foam ~2 mm wide foam and a hackle that is about one and a half times as long at the gap of the hook

Step 5- Dub the underbody with sulphur yellow dubbing, this helps reduce the hackle from slipping.

Step 6 - Wind on the hackle and tie off, I did five turns here. However, I think this might have been too light, I would maybe do about 6-7 turns

Step 7 - Split the hackle collar and fold down the foam and tie down. Here I folded back the foam and put a whip finish under the foam near the eye to lift the foam up out of the way of the eye, like what you would do for a deer hair caddis.

Step 8 - Now you can either remove the tying thread now, but I find it is best to keep it on right now so it does not untie. What you want to do is use a brush/fingers to pull the hackle from under the fly up the sides so that it is a hemisphere and you will get two separate wings. This will make the fly sit low in the water, perfect for an emerger. Last thing is put on some head cement, additional you can go in with a brush and bring out some of the dubbing from the underbody to make it more buggy.

